
This article will talk about how to set a future date for content to be published or removed and to set specific steps in publishing content. These steps can be tied to user roles and permissions.
Scheduling
Set a Schedule for Publishing Content

To schedule content to go live at a future date, follow the steps below:
- Click the Calendar Icon next to the publish button to open the calendar
- Select the appropriate Date/Time
- Click Set which turns the Publish button into a Schedule button
- Click Schedule
Once a change is scheduled, it will be listed in the revisions module in the right sidebar, as well as in the dashboard widget. Revisions can be edited by clicking on the revision link in the sidebar or the dashboard widget. When editing a revision, a banner at the top of the page would show that the editor is editing a scheduled revision.
Set Multiple Schedules
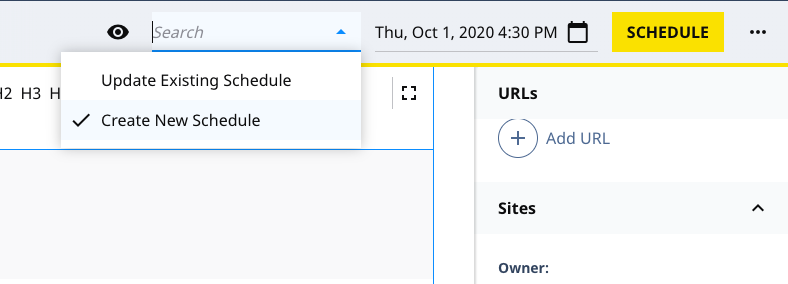
If an editor is viewing a scheduled revision but wants to modify it to create a new scheduled revision, change the dropdown from Update Existing Schedule to Create New Schedule and follow the instructions above for setting a schedule. This adds more than one scheduled revision to a piece of content.
Schedule Multiple Items in One Future Revision
The Brightspot Schedule Events widget also allows the capability to do a bulk schedule. A bulk schedule is the ability to schedule multiple pieces of content to be published on a certain future date.
To do a bulk schedule, follow the steps below:

- Go to Dashboard’s Scheduled Events Widget and click New
- Set the New Schedule options in the resulting window
- The Trigger Date is the date when all events associated with this schedule are published
- A message bar will appear at the top of the CMS
- Create a new item or edit an existing one, and Schedule the content
- The Schedule button will replace the Publish button in Schedule mode
- Return to the dashboard, and a new event will appear in the Dashboard
- Continue publishing content as described in the previous steps
- The Schedule Events Widget reflects all of the events scheduled for the publication for the bulk schedule
- To stop publishing with the bulk schedule, click Stop Scheduling in the message bar at the top of the CMS
Remove (expire) Content
If editors want content to be removed at a certain time, they can use the Expiration tab at the top of the page in the Brightspot editor. The expiration tab for a content item contains a setting for an expiration date.

Dashboard Widget
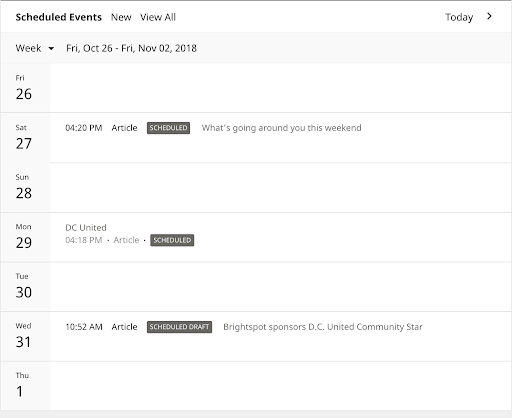
The Scheduled Events widget shows content set to go live at a future date. Each day has a section, with any content due to go live on that day visible. This widget gives editors the ability to complete two main tasks:
- View scheduled content
- Click on the scheduled content to edit.
Workflow
Workflows allow site admins to set specific steps in publishing content. This is used to manage how work is structured within Brightspot. These steps can be tied to user roles and permissions within Brightspot.
For example, if a site admin were to set up a workflow for articles, they could allow some people to begin writing an article, and give those who are writing the article a button to send an article for review (but not to publish). Once the articles are sent for review, other people could have the ability to review and edit that article, publish it, or send it back for rewrite. See the screenshot below for a visualization.
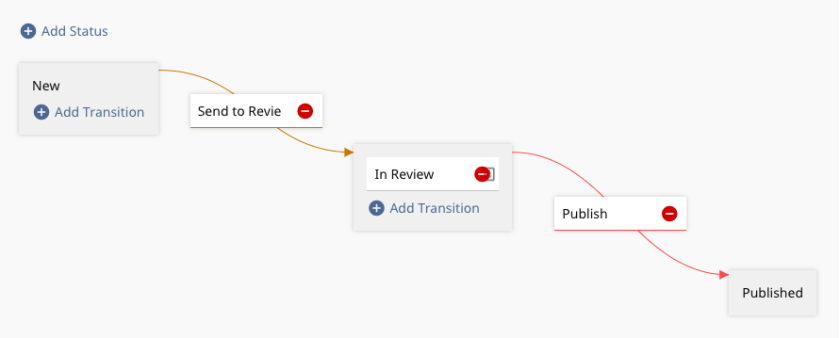
The site admin can add as many steps and user permissions as they need for a workflow. Contact websites@byu.edu to create a workflow for your site.