
Bulk uploading articles, events, images, and attachments is available to Brightspot editors who are mass-editing the website. This section will go over some common bulk uploading options and methods as well as how to use the uploaded content.
Images and Attachments
Images include standard image files like .jpg, .png, and even .svg. Attachments include document formats like .docx, .pdf, and .xls, among many others. Images should be uploaded at the largest size available to retain the best resolution. However, cropping should be done outside of Brightspot when possible.
The Brightspot Upload widget on the Dashboard allows editors to upload multiple files or a folder shown in the screenshot below. Follow the steps below to bulk upload from the dashboard:
- Click on “select” which opens a popup window.
- Choose whether to upload files or a folder.
- Select the desired file(s) or folder.
- Alternatively, editors can drag and drop files/folders into the widget to upload.
- Input the desired information for the uploaded items and click the "Upload" button.

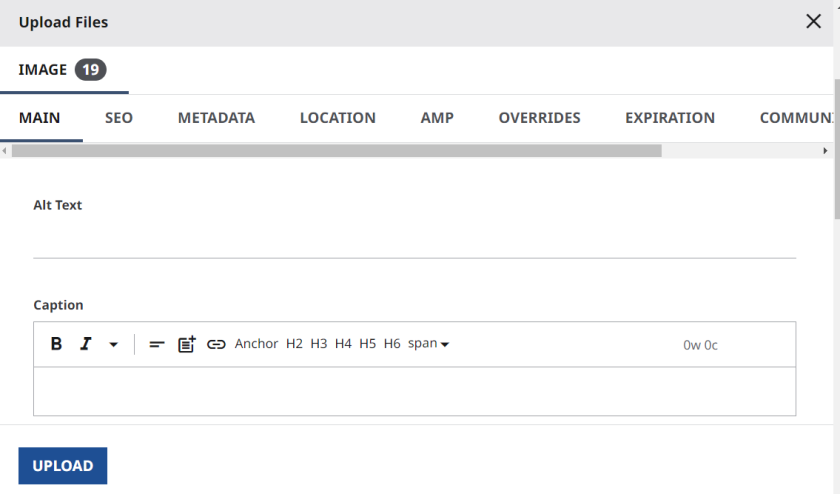
Bulk upload of images and attachments allows all uploaded file(s) or folders to be saved with the same information. This allows editors to edit multiple files at the same time during the upload. For example, the screenshot below shows that 19 images had been uploaded at once, the editor now has the option to input the same caption to all these images.
Using Attachments
Add attachments and images to pages as links through promos or buttons. When adding a promo or button, under the Item area, click on the magnifying glass and search for the item that was uploaded.
Once files and images are uploaded and used on a web page, viewers of the web page can download them. The "allow download" setting for images can be turned off in the image item's editor view under the "main" tab. However, videos and attachments are always downloadable.
Articles
Articles can be bulk uploaded from a CSV file, including full HTML. Since the files are comma-delimited, any field that may contain commas should have quote marks (") placed around the content. If uploading HTML in the body field, this means that HTML attributes may need to be surrounded in single quotes instead of double.
- Open a Search window by clicking on the search bar at the top of the CMS editor.
- In the Create New section, use the dropdown to select Articles CSV Importer as shown below.

- Click New.
- Download the CSV Template linked to ensure that the CSV column titles and title order match the columns in the template exactly. If the order or titles of the columns do not match correctly, the articles may not be correctly imported. See the Article feature guide for more details on the template.
- If any text fields contain commas, the field value must be wrapped in quotation marks, e.g. "event,description". Excel or Google Sheets will do this automatically when exporting to CSV.
- A Section and Tag for all articles imported if desired.
- Imported articles can be imported to a certain workflow status by typing the workflow status in the Workflow State field. Make sure that the workflow status set is an existing workflow status for articles on the current site and is spelled correctly.
- Click Import when ready.

Events
The Upload Events as CSV setting allows bulk upload of events. It can be accessed by clicking on the hamburger menu and bringing out the Admin drop-down menu. All site editors and admins should have access to this feature. Follow the steps below after opening the "Upload Event as CSV" page shown below to bulk upload events:

- Download the CSV template linked on the page and create a CSV of events that match the following. Column names in the CSV uploaded must match the column names on the template exactly. These columns include:
- Title: (Required) the visible name of the event
- Internal Name: use if the event has a different name for internal CMS use
- Description: a description of the event
- Start: (Required) in format "MM/DD/YYYY HH:MM" (e.g. "10/19/2019 19:30")
- End: in format "MM/DD/YYYY HH:MM" (e.g. "10/19/2019 19:30"); if not present, the event will be set as 'Has No End Time'
- Is All Day: use value "TRUE" to set Event as 'All Day;' note: multi-day events will automatically be set as 'All Day'
- Ticket Price: in format NN (e.g. '10'). If not present, will be set as 'Tickets: No'
- On-Campus Location: if On-Campus - to match an existing Location in the CMS, use the location's 'Internal Name' value
- Off-Campus Location: if Off-Campus - to match an existing Location in the CMS, use the location's 'Internal Name' value
- Location City: (Required for new Off-Campus locations) the city of the On/Off-Campus location; will only be assigned if creating a new location
- Location State: (Required for new Off-Campus locations) the State of the On/Off-Campus location; will only be assigned if creating a new location
- Contact Name: the person or organization to contact regarding this event
- Phone: contact's phone number
- Email: contact's email
- If any text fields contain commas, the field value must be wrapped in quotation marks, e.g. "event,description". Excel or Google Sheets will do this automatically when exporting to CSV.
- Upload the CSV file in the field called “CSV File”
- If all events in the upload share the same venue and/or category, select appropriate values from the drop-downs.
- Hit Save.
- New events are then saved as drafts and need to be reviewed before publishing.
Q & A
-
Toggle ItemCan a list be generated from a CSV import?
No, the items added from a CSV import cannot be generated into a list automatically. However, editors can manually create a list after the items are imported.