Sometimes sites are large and have many pages within. Sections are Brightspot's way to help organize these many pages. Different pages and content can be grouped into sections that to help the site have more organization.
Creating A Section
A section is seen by Brightspot as a normal content type and can therefore by created just like a new page or article. Click on the "+" button to the right of the search bar, and click Section from the dropdown.

When a section is created, a section page is also created, similar to a home page, but for a section. The page is accessible, but can also be removed (without removing the section) by clicking red "—" sign from the URLs menu in the top-right corner of the screen. The section's page can also be redirected to another page, such as a subpage in the section. This is done by copying the URL and pasting it into the URLs list of the page it should be redirected to (see URLs and Redirects). The URL of the section will need to be deleted before the new URL can be saved on the subpage.
Section Navigation allows for a custom navigation bar when a user is in the section. This means each section can have a more unique look to let the user know that they are on the same site but in a specific section. This is optional and is set to inherit by default (meaning it will look the same as the site's main page). For more information on editing and creating navigation menus, see the Header Feature Guide.
Content can be added to appear if the section page is not removed. If nothing is added to the content section, it will automatically create a dynamic list of Card, Image on Top promos of the content items found in it. Adding any content here will override the automatically created list of promos.
The Navigation Title can also be changed for an entire section The navigation title it the title or logo to the right of the BYU logo, such as where it says "Brightspot" at the top of this page. This can be changed from the default title by going to the Overrides tab, clicking on the Header dropdown, and scrolling down to Navigation Title. Switch it from Select to Inherit, and choosing the desired style (the different styles are explained in the Header feature guide).
Customize Section Header and Footer
The Aside/Below Dropdown allows for the creation of an aside or below than can be inherited by items in the section. This allows simple uniformity in setup of pages across a section. An example of this is the Related Trainings below found at the bottom of all feature guides.
Organizing a Section

Once created, the section can then be organized.
The parent option allows the creation of a deeper 'tree' of sections for the webpage. A head section can be created for part of a site, then additional sub-sections for that section can be created and then added by setting the head section as the parent. Therefore sections can be under each other as well as other content types such as pages and articles.
Other content items can be added to the section. Not all content types can be added, but the most commonly used ones are articles and pages. In the content item's editor page (i.e., that of an article), there will be an option for Section to select which section that item will be associated with (see photo below).
There is no direct way to add an image to a specific section, but there are some workarounds to achieve similar results:
- Add a tag to an attachment, then create a dynamic list for that tag within the section
- Insert the attachment within a list on the section page
- Link the attachment as an External Content Module linked to the section page

Permissions with Sections (Admins only)
User permissions and access restrictions can be regulated by section.
User Permissions

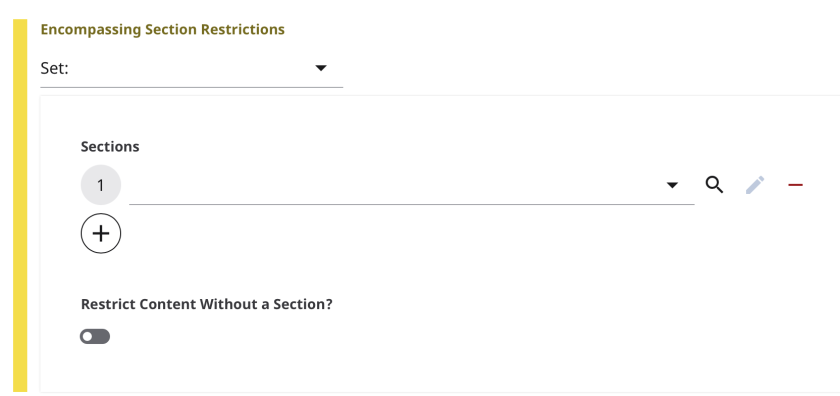
This restricts a site editor's access to edit only certain sections of a website. In the Admin menu in Brightspot, under Users, search for the user whose permissions will be changed. In the Permissions tab, click on their Permissions Set and scroll down to Encompassing Section Restrictions. Change it from None to Set: and in the new section dropdown that appears, select the section the user should have access to. Multiple sections can be added. See the User Permissions feature guide for additional information granting users access to edit a website.
Access Restrictions
This means that users can either be restricted to certain sections of a site or be restricted from certain sections. These restrictions can be based on a user's role at the university or just by requiring a valid login. This is done by going to the Overrides tab in the section and opening the Authorization dropdown menu. It is set to Inherit by default, but can be changed to Override to add a different authorization setting to the section. More information on setting up authorization settings can be found in the Access Restriction feature guide.
